前言:今天介绍一SpringBoot的Starter,并手写一个自己的Starter,在SpringBoot项目中,有各种的Starter提供给开发者使用,Starter则提供各种API,这样使开发SpringBoot项目变得简单。实际上Starter简单来说就是Spring+SpringMVC开发的。话不多说开始撸代码

创新互联建站成立以来不断整合自身及行业资源、不断突破观念以使企业策略得到完善和成熟,建立了一套“以技术为基点,以客户需求中心、市场为导向”的快速反应体系。对公司的主营项目,如中高端企业网站企划 / 设计、行业 / 企业门户设计推广、行业门户平台运营、
手机APP定制开发、
移动网站建设、微信网站制作、软件开发、
成都服务器托管等实行标准化操作,让客户可以直观的预知到从
创新互联建站可以获得的服务效果。
1.创建项目
首先在idea中创建SpringBoot项目,并首先创建一个BeautyProperties类,代码代码如下:
package com.mystarter;

import org.springframework.boot.context.properties.ConfigurationProperties;

@ConfigurationProperties(prefix = "beauty")
public class BeautyProperties {
    private String name;
    private Integer age;
    public String getName() {
        return name;
    }
    public void setName(String name) {
        this.name = name;
    }
    public Integer getAge() {
        return age;
    }
    public void setAge(Integer age) {
        this.age = age;
    }
}
public class ActionService {
private String name;

private Integer age;

public String sayHello() {
    return "my name is "+ name +",I am "+ age +" years old";
}

public Integer getAge() {
    return age;
}

public void setAge(Integer age) {
    this.age = age;
}

public String getName() {
    return name;
}

public void setName(String name) {
    this.name = name;
}
}
 - 最后再创建一个类ActionServiceAutoConfiguration,这个类是重点,代码如下:
 - @Configuration注解表明这是一个配置类
 - @EnableConfigurationProperties(BeautyProperties.class)表明开启@ConfigurationProperties这个注解,使这个注解生效
 - @ConditionalOnClass(ActionService.class)条件判断注解,表明有这个类ActionService,条件才生效,即配置才生效。
 - 通过@Autowired将BeautyProperties 类自动注入IOC容器中
 - @Bean将返回的值注入到容器中
package com.mystarter;
import org.springframework.beans.factory.annotation.Autowired;
import org.springframework.boot.autoconfigure.condition.ConditionalOnClass;
import org.springframework.boot.context.properties.EnableConfigurationProperties;
import org.springframework.context.annotation.Bean;
import org.springframework.context.annotation.Configuration;
@Configuration@EnableConfigurationProperties(BeautyProperties.class)
br/>@EnableConfigurationProperties(BeautyProperties.class)
public class ActionServiceAutoConfiguration {
@Autowired
BeautyProperties beautyProperties;

@Bean
ActionService helloService() {
    ActionService helloService = new ActionService();
    helloService.setName(beautyProperties.getName());
    helloService.setAge(beautyProperties.getAge());
    return helloService;
}
}
- 然后再resources文件夹下的application.properties文件中,加入如下配置,作为使用这个Starter时候,没有设置相关值的时候作为默认值注入到配置类中
beauty.name=李依依默认
beauty.age=18
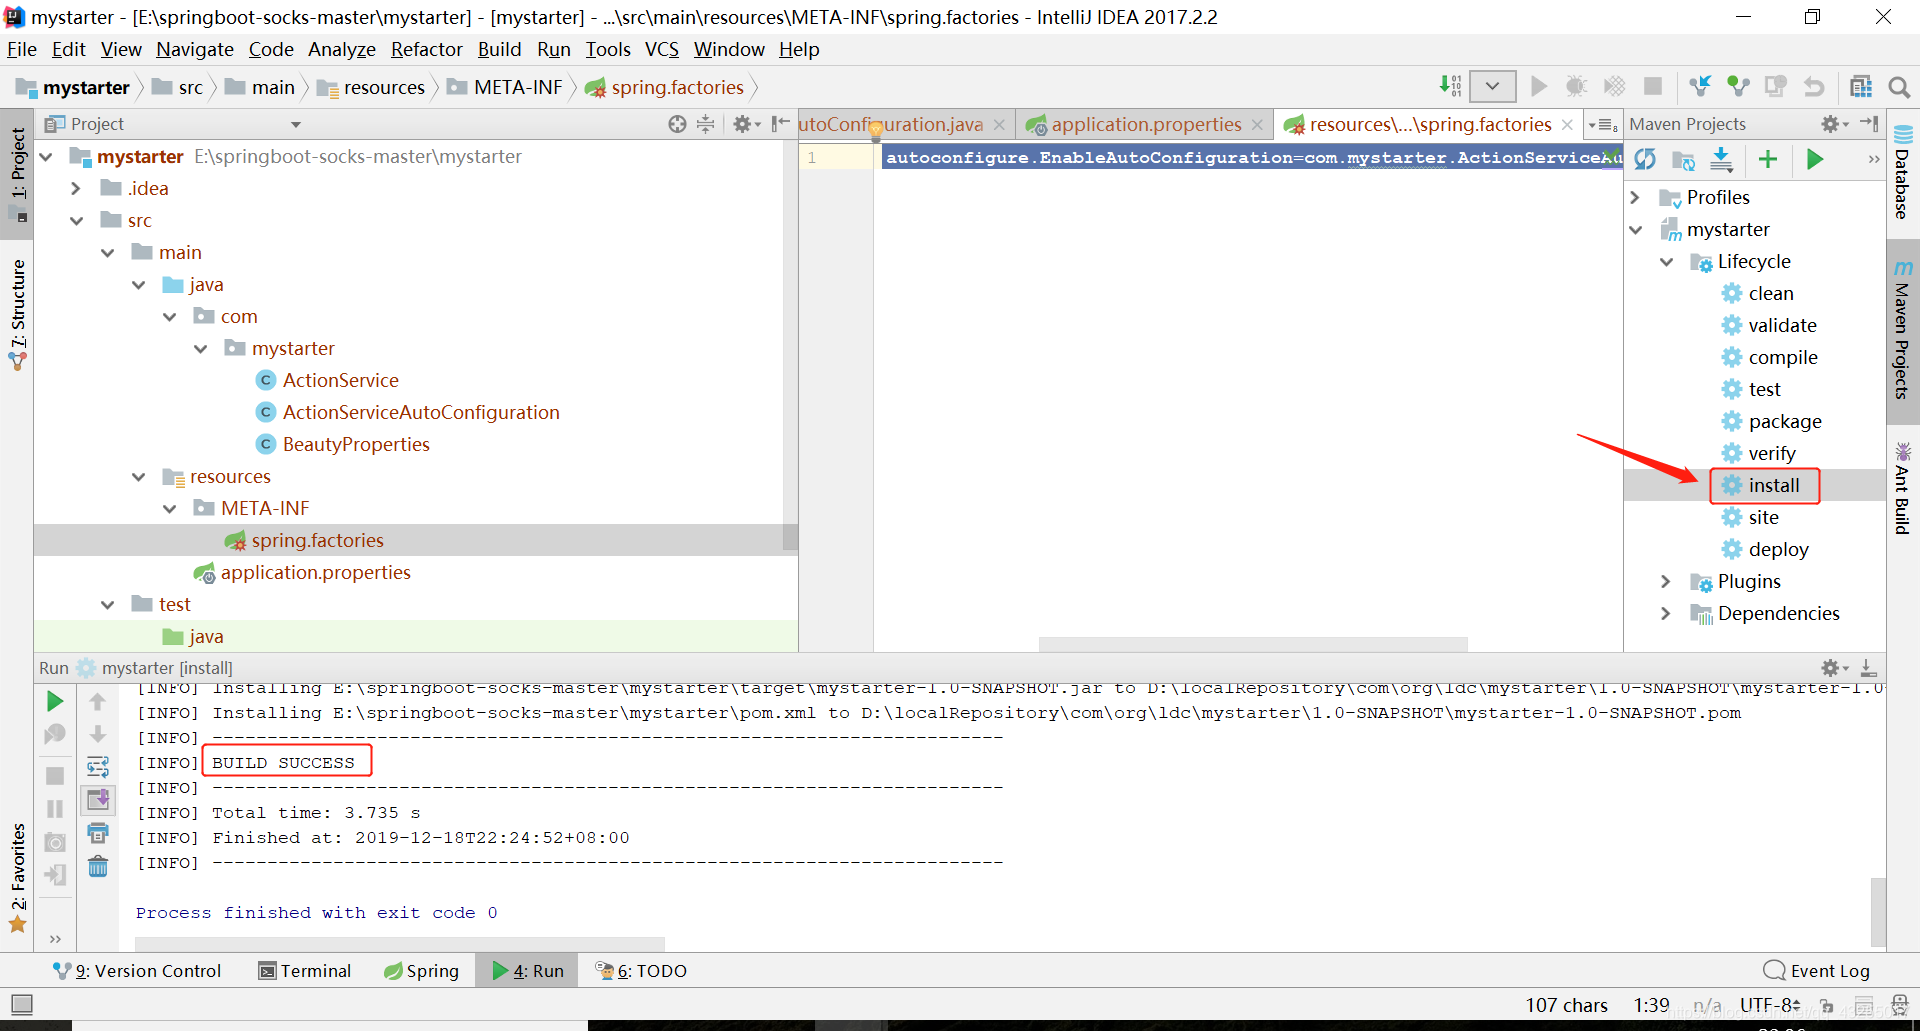
- 最后再resources中新建一个META-INF文件夹,然后在新建一个文件spring.factories,这个名字和文件夹的名字不能改,加入配置如下,这个表明指定自动配置的类的全路径,自动配置的时候就找到这个全路径,实例化这个对象到容器中
org.springframework.boot.autoconfigure.EnableAutoConfiguration=com.mystarter.ActionServiceAutoConfiguration
- 最后一步点击install,出现Build Success说明这个Starter已经安装到本地maven仓库中,可以被别人引用
## 2.测试Starter
新建一个SpringBoot工程,在application.properties的文件中加入如下配置:
beauty.name=李依依
beauty.age=24
在pom文件中引入依赖,如下:
com.org.ldc
mystarter
1.0-SNAPSHOT
然后测试,如下代码
package com.org.ldc.mystarter;
import com.mystarter.HelloService;
import org.junit.jupiter.api.Test;
import org.springframework.beans.factory.annotation.Autowired;
import org.springframework.boot.test.context.SpringBootTest;
import org.springframework.test.context.junit4.SpringRunner;
@SpringBootTest
class TestmystarterApplicationTests {
@Autowired
HelloService helloService;

@Test
public void contextLoads() {
    System.out.println(helloService.sayHello());
}
}
执行测试,出现如下,说明创建成功

>更多的教程请关注:非科班的科班,路过有空的大佬们点个赞,谢谢大家
另外有需要云服务器可以了解下创新互联cdcxhl.cn,海内外云服务器15元起步,三天无理由+7*72小时售后在线,公司持有idc许可证,提供“云服务器、裸金属服务器、高防服务器、香港服务器、美国服务器、虚拟主机、免备案服务器”等云主机租用服务以及企业上云的综合解决方案,具有“安全稳定、简单易用、服务可用性高、性价比高”等特点与优势,专为企业上云打造定制,能够满足用户丰富、多元化的应用场景需求。
标题名称:手撸一个SpringBoot的Starter,简单易上手-创新互联
链接分享:
http://cdkjz.cn/article/ggsho.html


